Ikea Sektion High Cabinet Drawer Installation
Many of you have asked for tips and tricks to make installing Ikea kitchen cabinets go more smoothly and look (and function) the best it possibly can. And the good news is that after installing three of them in a little over a year and a half (!!!), we have learned A TON about how to make things a little easier and help you end up with a better result. So settle in, I've got twenty tools & tips that can make all the difference.
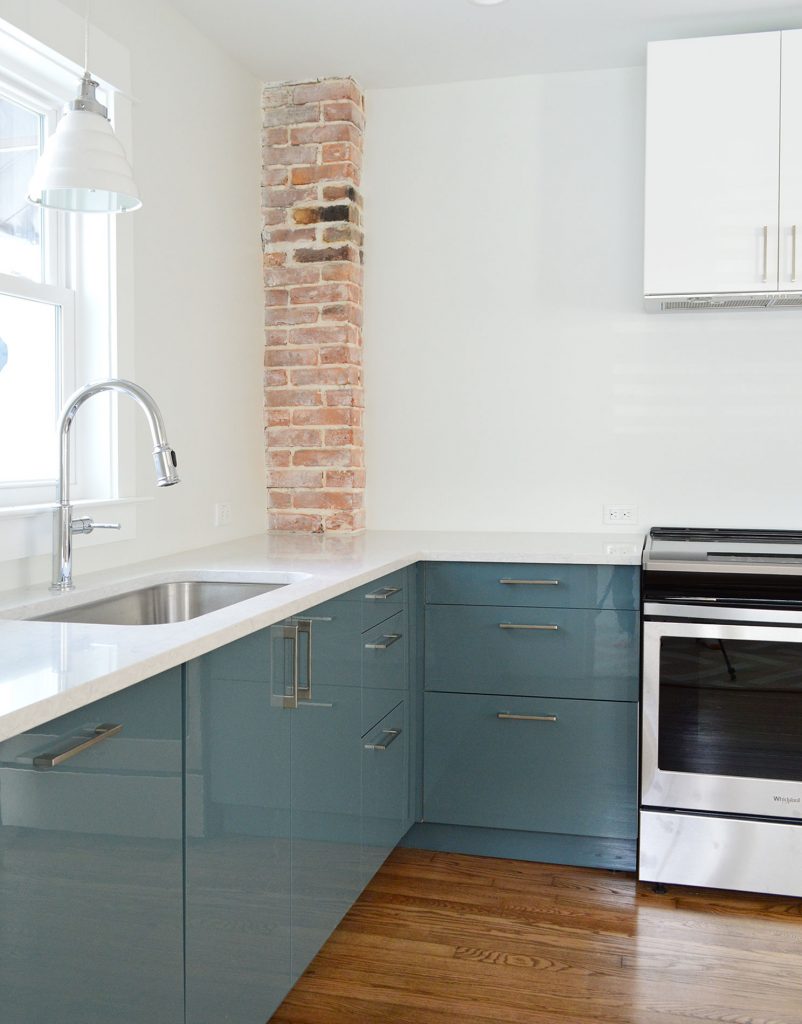
First off, we like Ikea cabinets and have personally installed them in five rooms: our laundry room & bonus room at home, our beach house kitchen, and now these two duplex kitchens. We have lived with the ones in our home for nearly five years and they're great. Not a single issue. They are smartly made, very durable, and they have a great 25-year warranty and a great price tag (often thousands cheaper than other options). They also come with many thoughtful features like soft close drawers that come standard and tons of customization options. So yeah, some Ikea furniture is known for feeling a little cheap and wobbly, but that has not been our experience with their cabinets AT ALL.
Ok, but back to the point of this post – tips and tools to make your Ikea cabinet install easier. Some of the tools I'm listing here are absolutely necessary and some are optional (they'll just make the process easier, faster, and less frustrating). And as you read through this list, I think you'll also get a pretty good sense of the steps (and curveballs) involved too, which I hope will help as well.

I'll include a short bulleted list of everything at the end of the post too, that way you can use it as a tool checklist. But let's just get right into it.
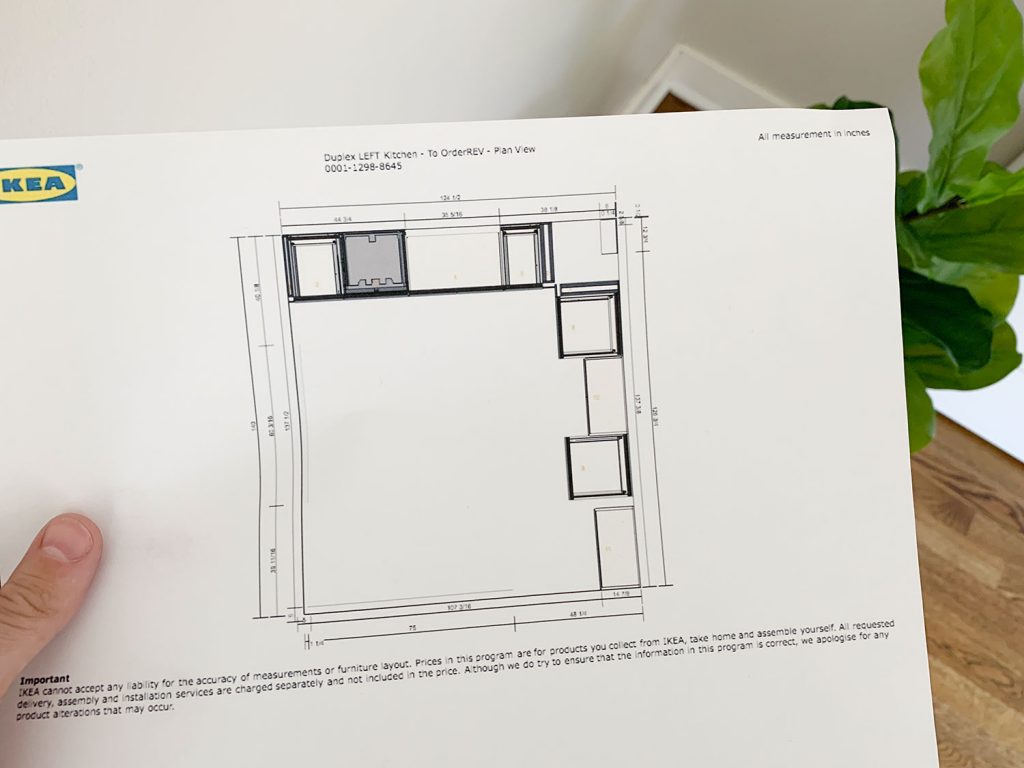
1. Your Itemized Receipt/Order
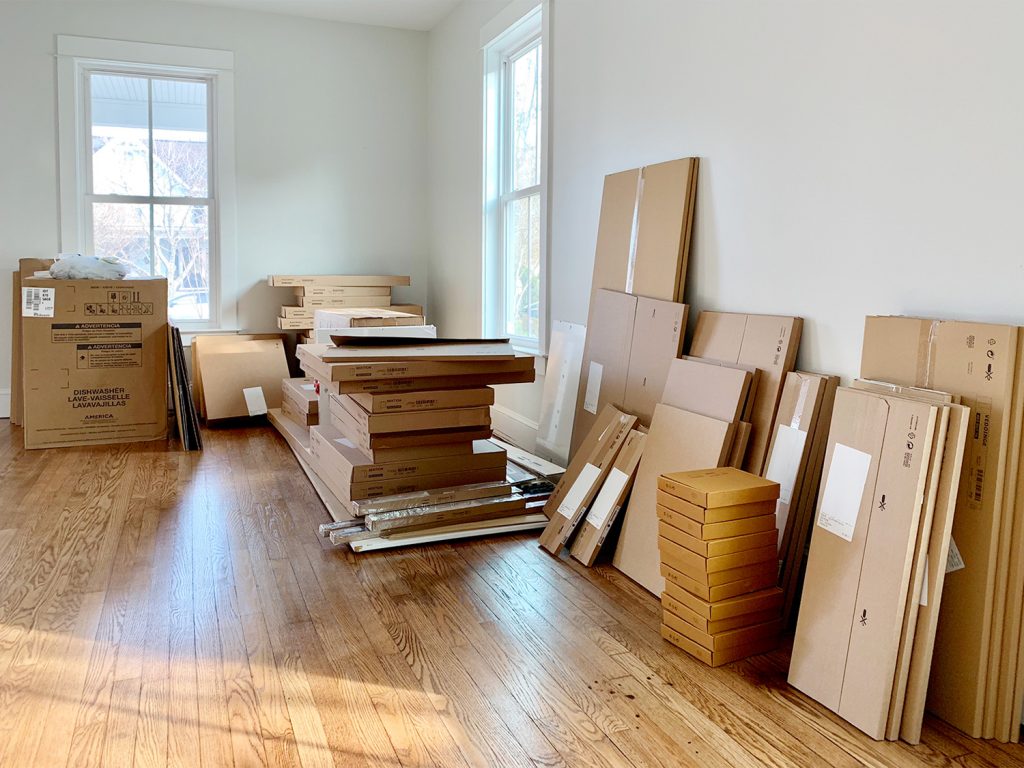
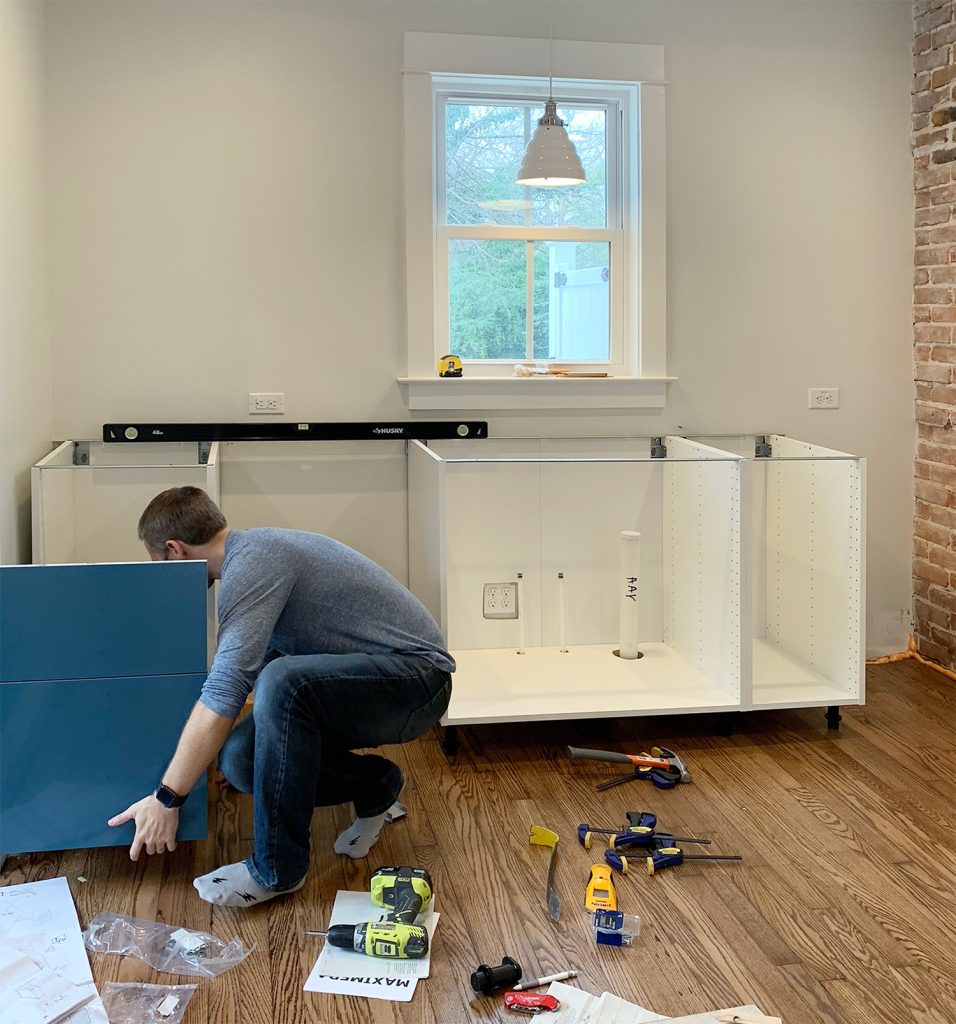
Before you build anything, you'll want to take time to inventory and organize all of your boxes. We had over 200 boxes (!!!) delivered for our two duplex kitchens, so it helped to sort everything into piles beforehand.

We personally like to sort boxes by item (
2. Power driver (with Philips head)
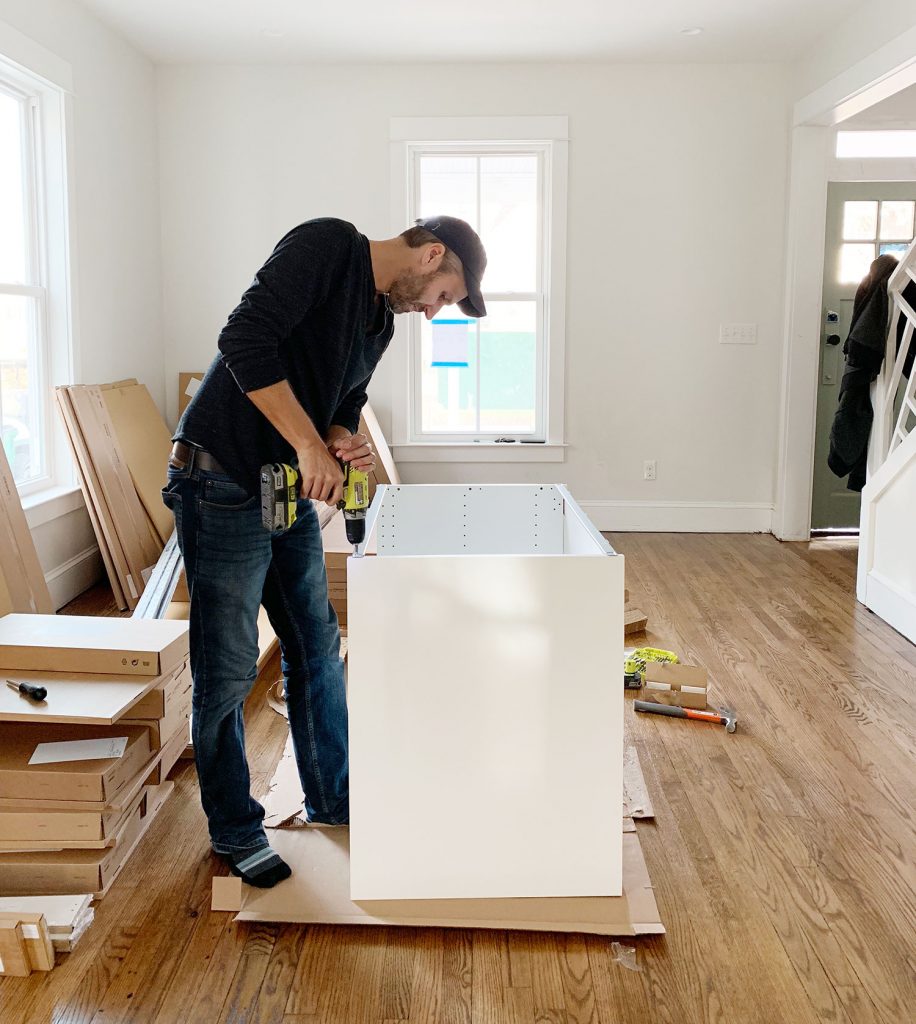
This combo gets a lot of use in this install (especially the power driver/drill) – but they're needed first to construct your cabinet boxes (
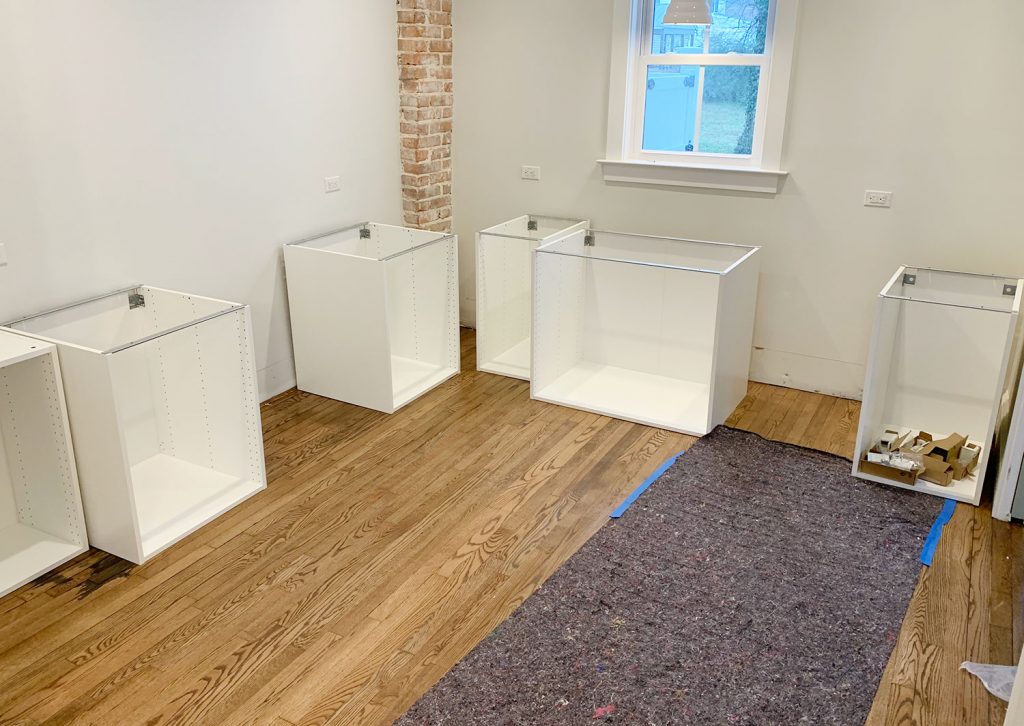
And even though Ikea is known for their
3. Hammer
You'll also need a hammer handy to nail the MDF backings onto the cabinet backs. It may also be useful if you need to tap any anchors into your drywall when it comes time to hang your cabinets.
4. Magnetic Drill Bit Holder
Having one of these on your drill can save you a lot of frustration while building your cabinets and drawers. You can buy one separately for about $2 or it often comes included in drill/driver sets like ours. It'll magnetize your drill bits, meaning many of the screws that Ikea provides will stick to your drill handsfree (thanks to the magic of magnets). We found this VERY helpful when trying to screw into small spots that were too tight for our fingertips (we couldn't reach in and hold the screw steady, so having a magnetized drill bit that held it for us was key).
5. Measuring Tape
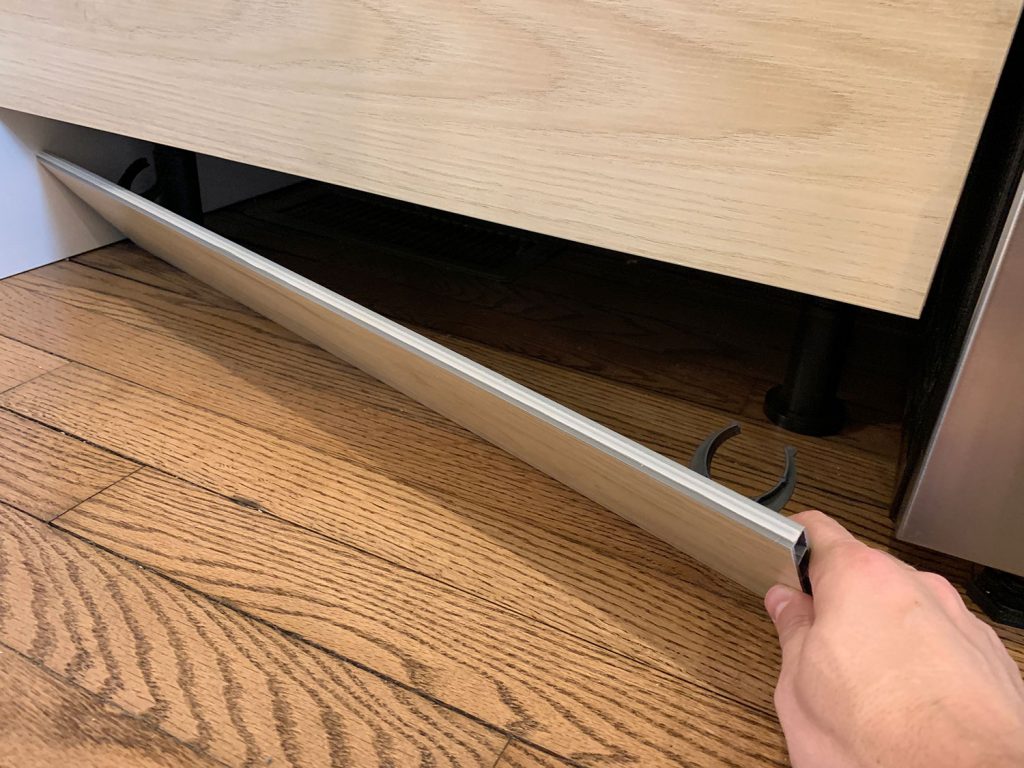
The next several tools are needed for attaching your cabinets to the wall. Whether you're doing upper or lower cabinets, Ikea's system uses a metal track (called the
For now, just know the measuring tape will be useful in determining exactly where in your kitchen you're placing your cabinets – both side-to-side on each wall, and how high the rails need to be hung (Ikea provides guides for this in
6. Dremel Or Hacksaw
Once you know where each run of cabinets is going, you'll need to cut your metal suspension rails to size. The rails are sold in 7 foot lengths, but if you only have 4 feet of cabinetry in one area – you only want 4 feet of rail.
You can cut these by hand with a hacksaw, but we find it much faster to use our Dremel Multi-Max with a metal cutting blade.

I typically mark my cut on a piece of painters tape and cut across the open top of one of our cabinet boxes (with a piece of cardboard to protect the cabinet underneath).
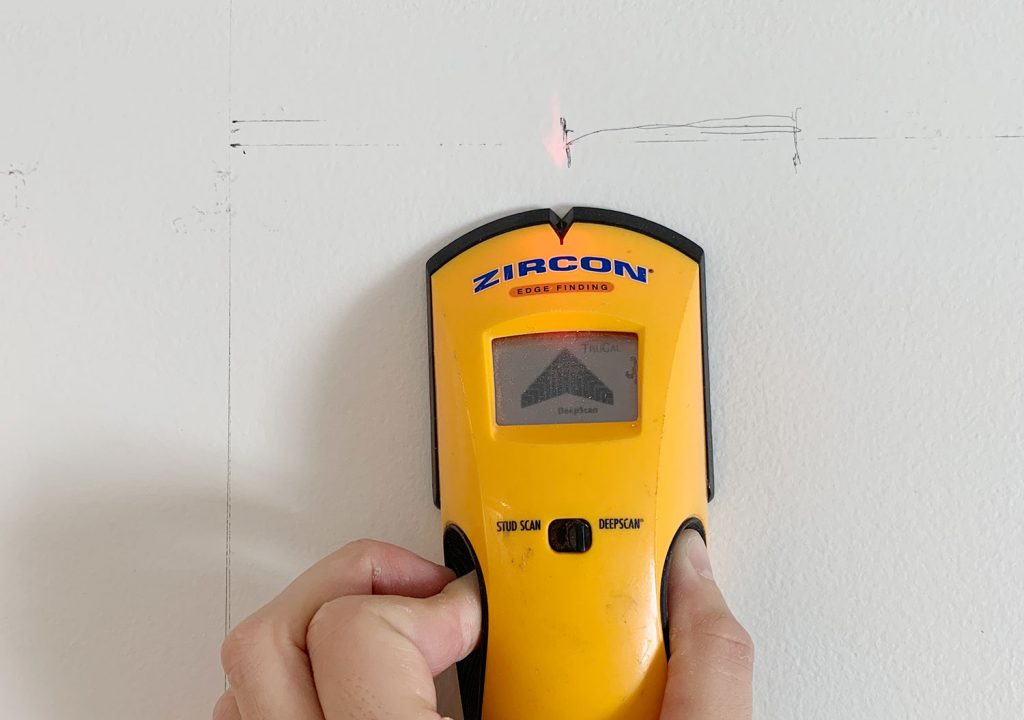
7. Stud Finder
You want to screw the rail into at least a few studs in your wall for maximum hold. So it's smart to use a stud finder to locate and mark the studs that fall within the area you're hanging the rail – that way you can be sure to go into them and get a nice firm hold. Since studs are typically 1.5″ thick, I like to mark the full width that my stud finder indicates, since you may not know exactly where the holes on the
8. Medium-Size Level
Once I know where my studs are, I hold my cut-to-size metal rail and, with a medium sized level (like this 24″ level) held against it, I mark the top line of my rail AND where the holes line up with my studs. I suggest amedium sized level for this just because they're easier to wrangle during this step.
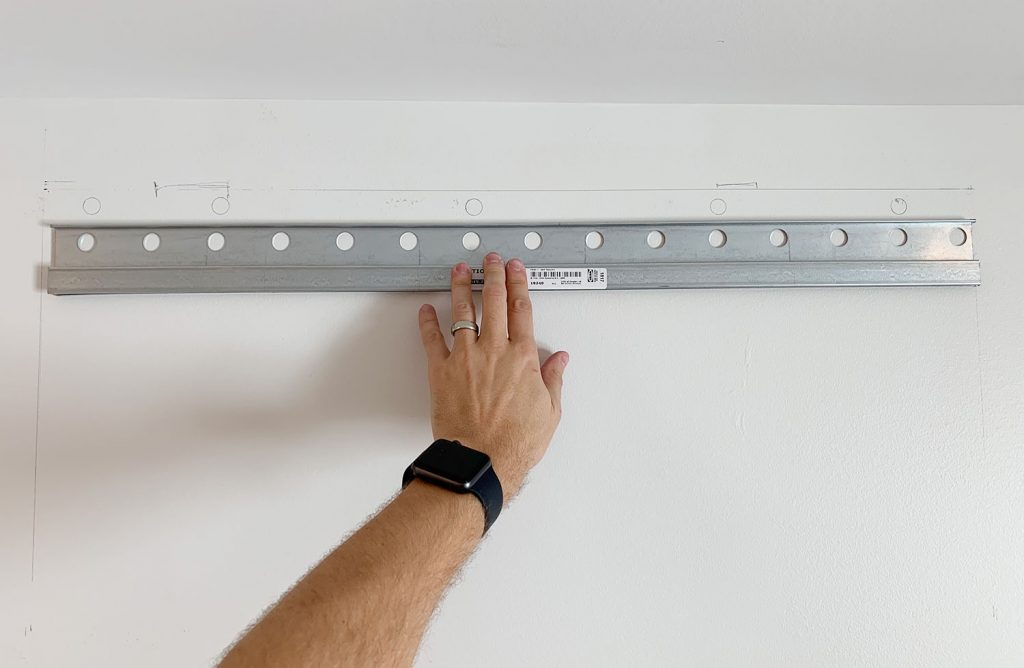
I also mark a few additional holes where I'll use screws paired with anchors. I believe Ikea suggests at least having a screw every 12″ inches – but for short sections like this, I like to make sure I hit at least 2 studs and then have a screw at either end of the rail that goes into an anchor.
9. Heavy Duty Screws & Anchors
After some trial and error, we found that we like using these GRK Fastener Cabinet Screws to secure our
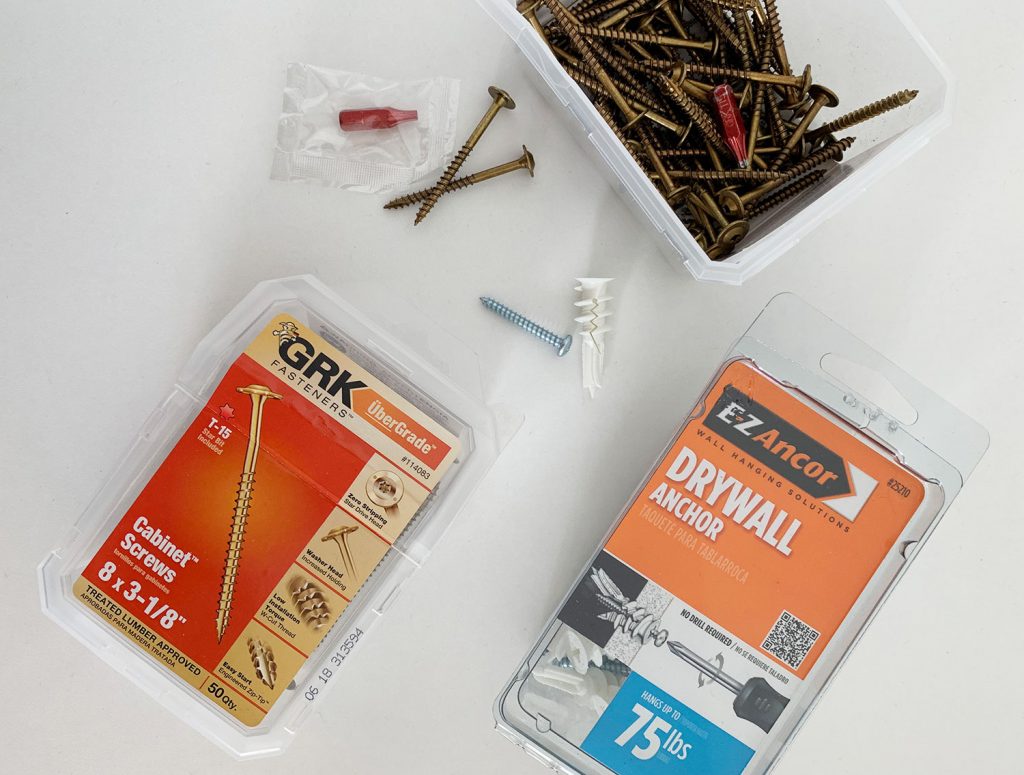
We also like to have some anchors on hand too, like these E-Z Ancor packs that come with screws, for those additional support screws that we add.
10. Long Level
One of the biggest challenges we've found in this process is getting things level. Just because you've hung your rail level on the wall doesn't prevent things like slopes in your floor or bows in your wall from chucking some additional curveballs in your direction. So your best defenses are a lot of patience and a nice long level, like this 4ft level we bought specifically for this task (after learning that it's a lot harder to use a smaller level to solve these issues).
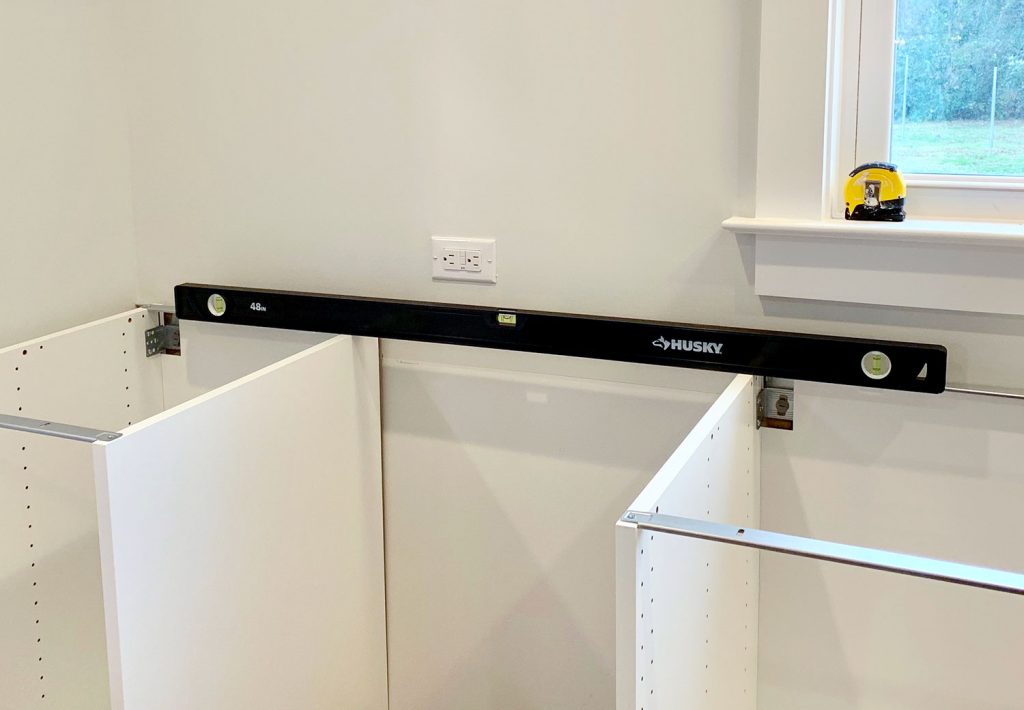
Your medium sized level will help with the process as well (especially in checking that each individual cabinet is level front-to-back) but you'll want something bigger to check longer spans of cabinets. You could purchase an even longer level if you wanted, but they can start to get pricey, so we found a 4 foot long level to be sufficient, especially for checking across the gaps that you'll leave for appliances like a 30″ stove or a standard 24″ dishwasher.
11. Shims
A lot of level issues can be corrected by twisting the adjustable plastic feet that come with your base cabinets, or by adjusting the placement of your metal rail. But if you're dealing with bows in your wall (which you can find by placing your long level against it) you'll want to have some wood shims on hand to place behind the metal rail. In these old houses, we had to use quite a few in a couple of places!
12. Jigsaw
When it comes time to install your sink base cabinet, you'll need to make some holes for your plumbing. For smaller pipes like your water supply
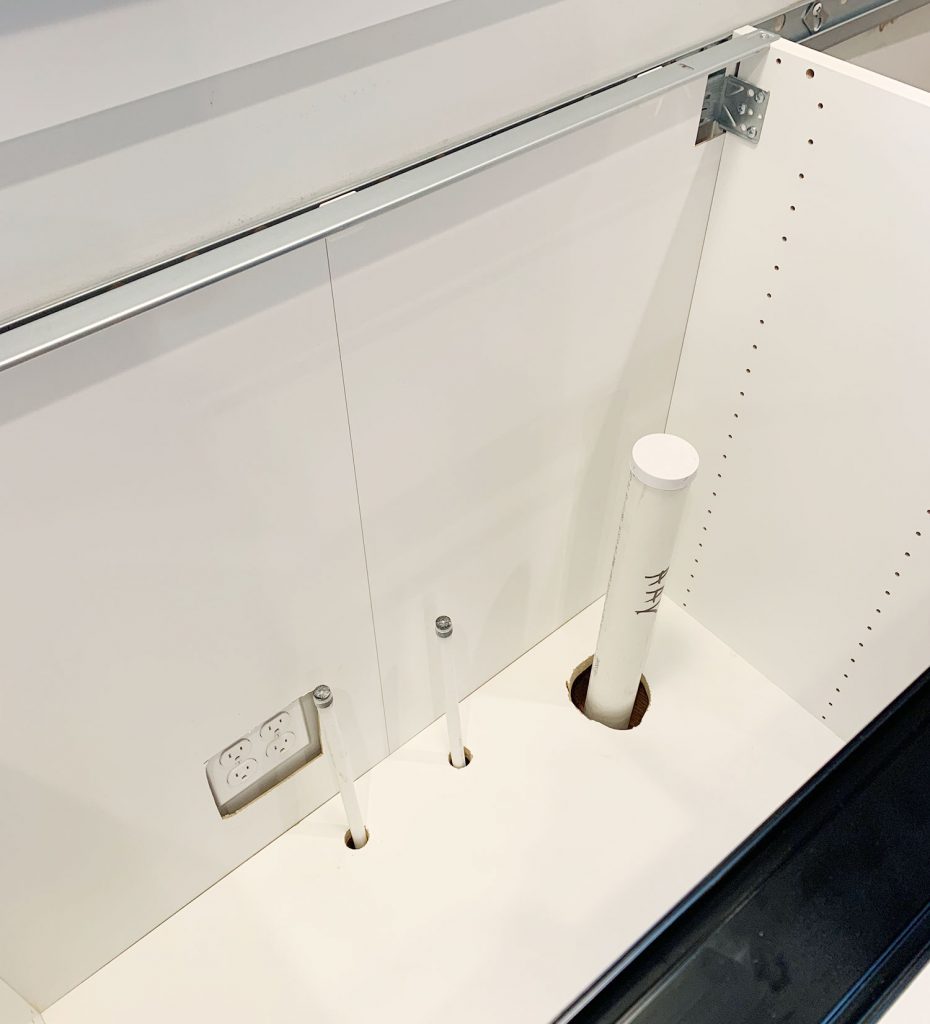
Just be sure to make careful measurements before you cut. We usually put a layer of painters tape around the area we're cutting. It allows us to mark our cut without marking the cabinet, plus the tape helps keep the white finish from cracking off. Either way, this stuff will all be hidden under the sink so it doesn't have to look perfect.
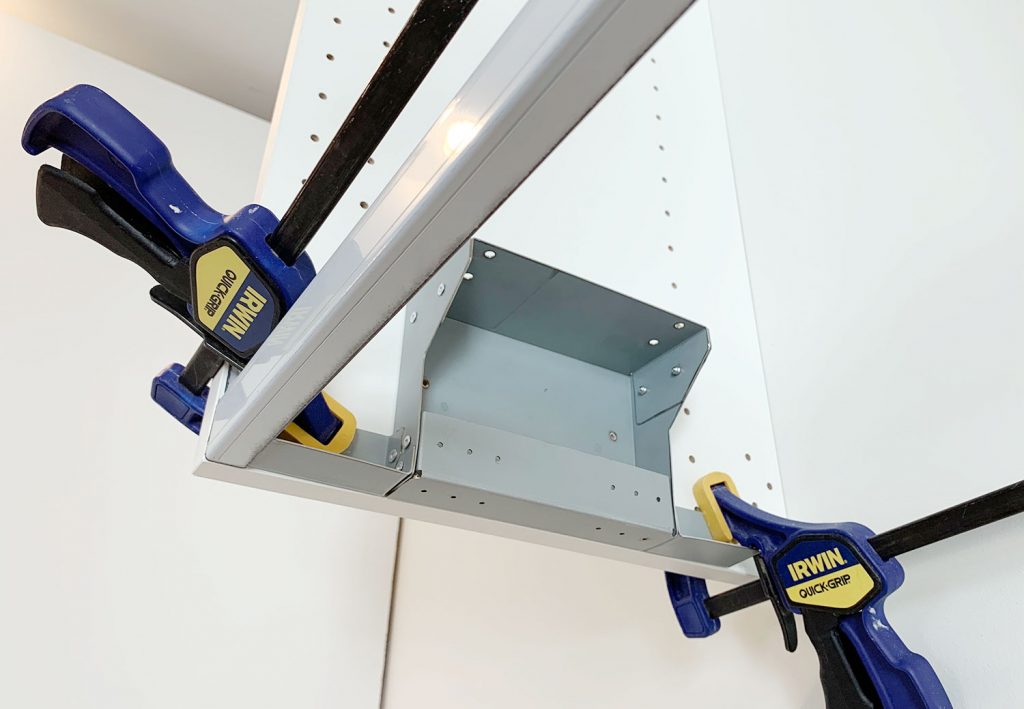
13. Clamps
As you start to get your cabinets in place and leveled, you'll want to secure any adjacent cabinets together. Ikea provides screws for doing this, but you'll want to use some clamps (we like these 6″ bar clamps) to hold the cabinets tightly together before you begin screwing.
We didn't get a picture of that process, but the clamps come in handy A LOT as an extra set of hands – like when we were installing this bracket for the exhaust hoods that we hung over the stoves.
14. Circular Saw and/or Table Saw
In addition to screwing cabinets together, you may find yourself attaching cover panels or filler pieces at some point. Cover panels go on exposed ends of cabinets (so you can't see the metal rail they hang on) or, in our case, we used some large cover panels to create a box around the fridges at the duplex. So you'll need some sort of larger saw to make long, straight cuts. Our cover panels were a bit too wide, so I used a circular saw to shave a few inches off one side.
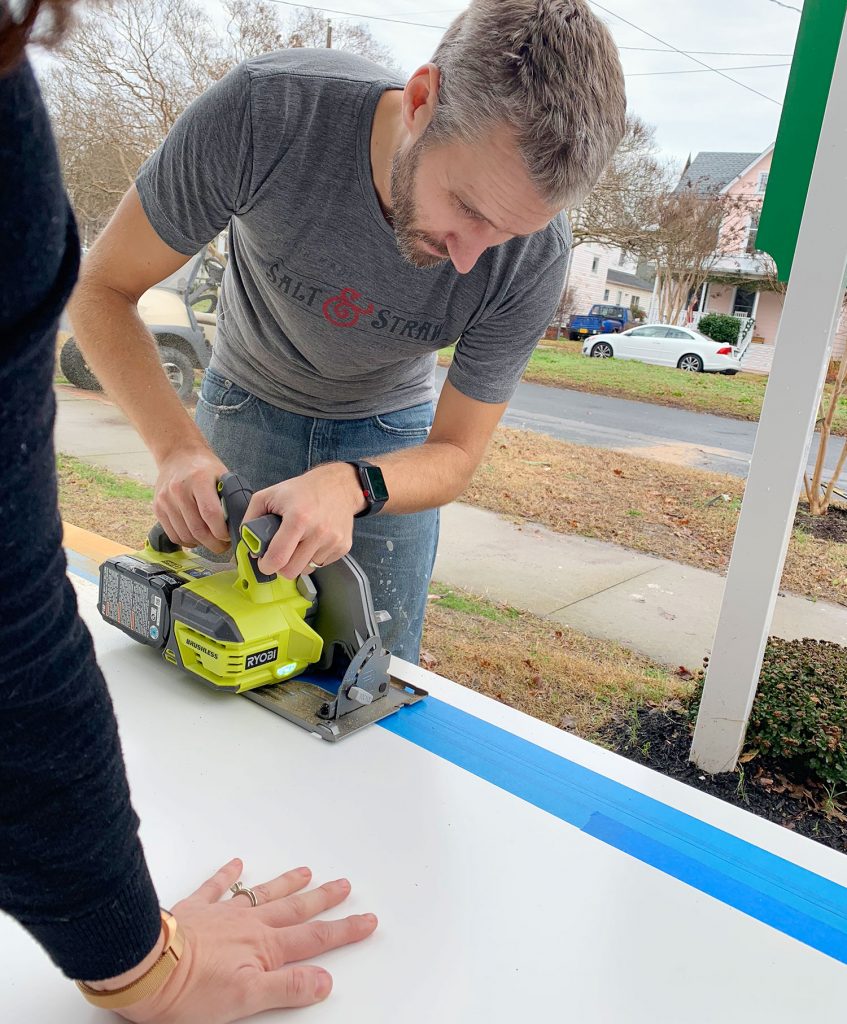
I didn't use a table saw for that panel because running
15. 2 x 4″ Boards
Every time we've installed an Ikea kitchen we've needed some 2×4″s at some point. At the beach
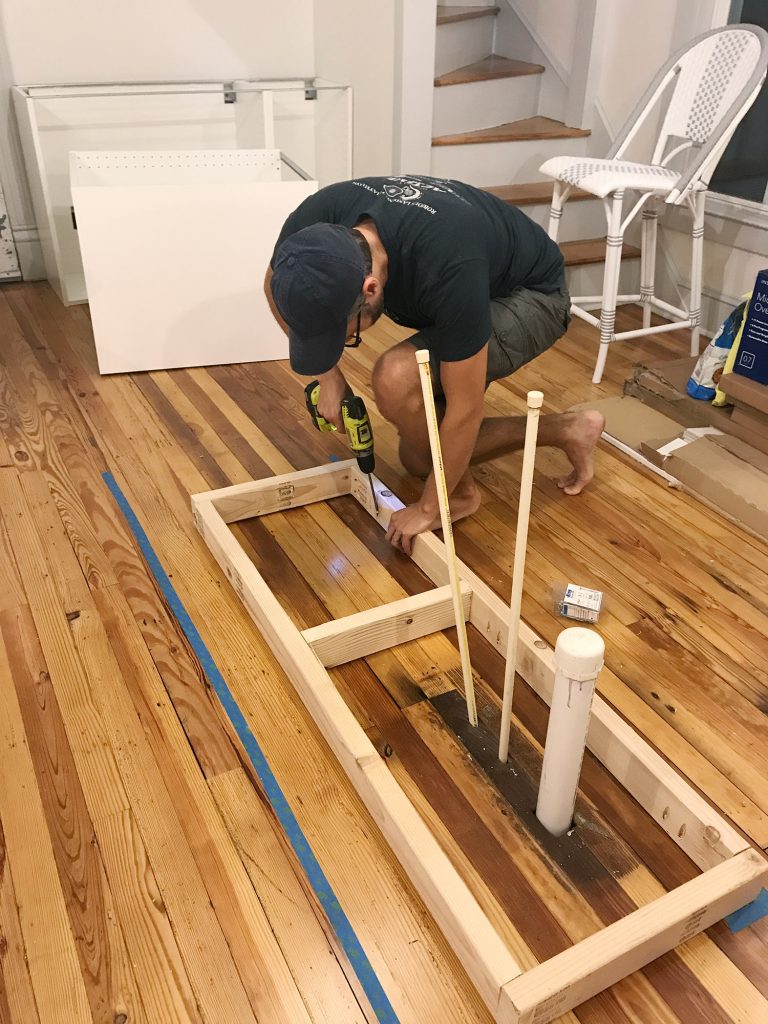
Basically, they were just some boxes we made almost the same size as each cabinet (slightly narrower to account for the
16. Kreg Jig
Now, a Kreg Jig isn't absolutely necessary here, but I've had one for around nine years now so I'm accustomed to breaking it out for tasks like this. So while I'm a big fan of having one in your arsenal, I understand that you've just bought a new kitchen so tacking on another $99 tool to your budget isn't always practical.
I did use it again for the duplexes to make more 2×4″s into boxes (this time for mounting the above-fridge cabinet away from the wall, so it sat closer to the front of the fridge).
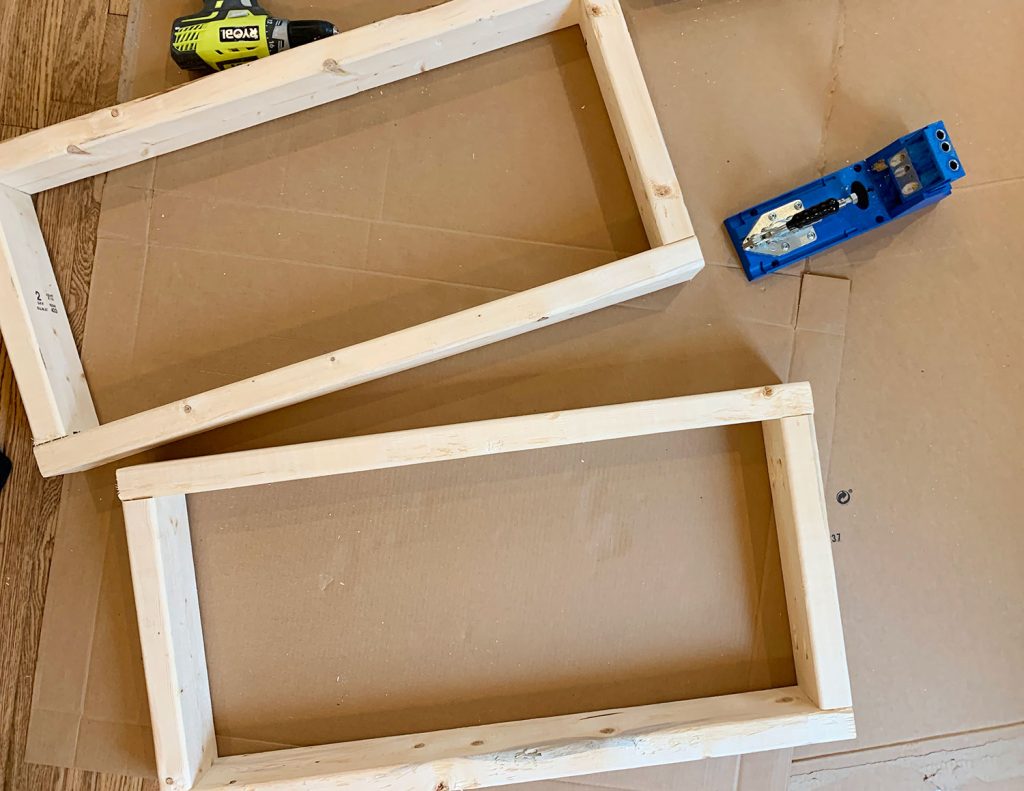
The boxes acted as an extension of the wall. The top one was for mounting the metal rail, and the bottom one gave the base of the cabinet a spot to rest so it didn't tip back wildly. They also gave us a way to mount that large cover panel to box in the fridge.
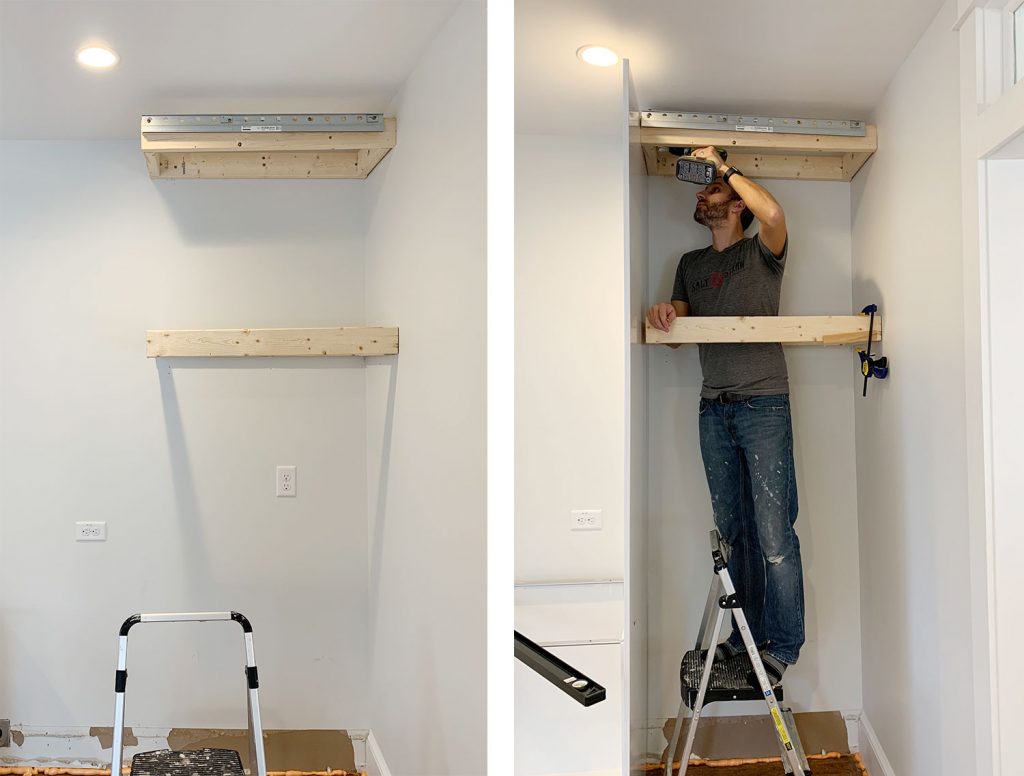
I guess I should add in here that a step ladder is also useful, so let's officially put that on the list.
17. Manual Screwdriver
Once your cabinets and panels are hung, leveled, and secured to each other, the next part of the process is to add your doors and drawers. The instructions here are pretty self-explanatory and the main tool you need is a power driver to screw everything together. Our main word of warning is to pay close attention to screw placements when you're assembling drawers! Depending on where each drawer goes in the stack (top, middle, or bottom) there are sliiiiight differences in the instructions. So while we find it most efficient to do multiple drawers at once, we still pay close attention – especially for the first few.
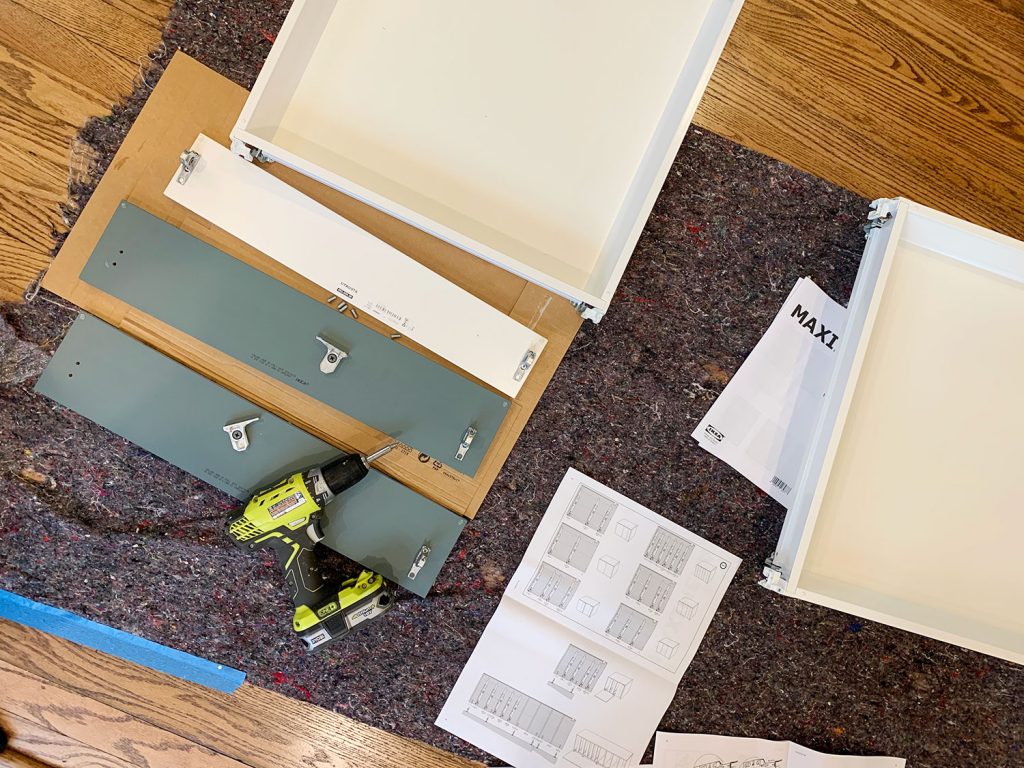
Ok, back to the manual screw drivers. One big part of installing doors and drawers is tweaking and adjusting them for even and level spacing. For
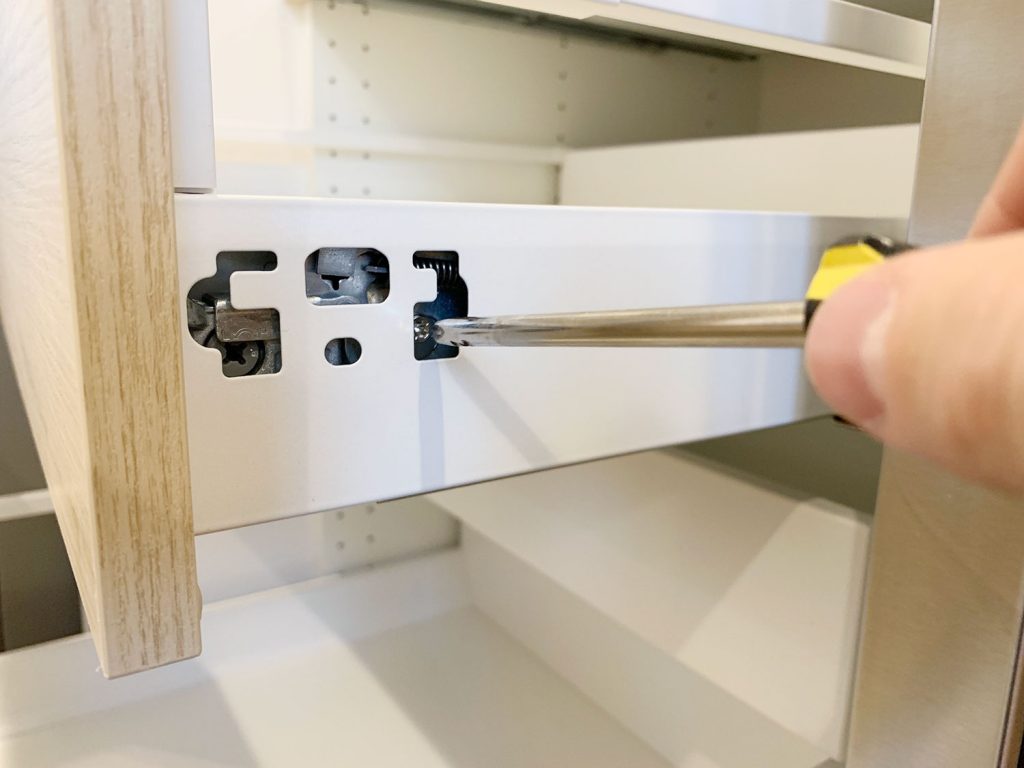
You also will want a flathead screwdriver for twisting the little piece of plastic that locks each cabinet onto the metal rail, which comes up earlier in the process.
18. Miter Saw
Tasks like cutting your 2×4″s or even your filler pieces will be made easier and faster by having a miter saw on hand (we own this miter saw). You'll also find that it's helpful when it's time to cut and install your
In our beach house kitchen we installed quarter round in front of the Ikea baseboards to help disguise some floor level issues, as well as using quarter round around the island where we built our own base (we used standard wood baseboard trim instead of the Ikea
19. Nail Gun
In addition to using a nail gun to attach additional molding like quarter round if you're adding that (again, the Ikea baseboards just snap on so you won't need it for that) I also find a nail gun comes in handy sometimes for attaching small filler pieces. Especially in cases where they're too thin to take a screw.
20. Others Tools
Real quick, here are some other items you may want to have on hand. Some I've mentioned or shown already, but haven't officially listed:
- Pen or pencil
- Painters tape
- Step ladder
- Utility knife or scissors (for opening boxes faster!)
- Crowbar (if you need to remove any baseboard or molding)
- Broom, dustpan, and/or vacuum with a
hose (we have this one)
Your Ikea Kitchen Installation Tool Checklist
As promised,
- Your itemized receipt / order
- Hammer
- Manual screwdrivers
- Crowbar
- Measuring tape
- Pen or pencil
- Painters tape
- Step ladder
- Power driver
- Drill bit set with magnetic bit holder & 3/4″ bit for plumbing holes
- Dremel or Hacksaw
- Stud finder
- Medium level (24″)
- Large level (48″)
- Wood shims
- Cabinet screws (roughly 4 per cabinet)
- Screws with anchors (roughly 2 per cabinet)
- Jigsaw
- Circular saw and/or table saw
- Miter saw
- Utility knife or scissors
- Nail gun
- Clamps
- 2×4″s (optional)
- Kreg Jig (optional)
- Broom, dustpan, and/or vacuum with
hose
Good luck and happy installing!
P.S. For other posts we've written about installing Ikea cabinets, here's one about installing our laundry room cabinets 5 years ago , and another one about using Ikea cabinets to make a wall of built-ins for our bonus room .
*This post contains affiliate links*
Ikea Sektion High Cabinet Drawer Installation
Source: https://www.younghouselove.com/tools-and-tricks-for-installing-ikea-kitchens/
0 Response to "Ikea Sektion High Cabinet Drawer Installation"
Post a Comment